Showing posts with label rod building. Show all posts

Tuesday, September 01, 2009

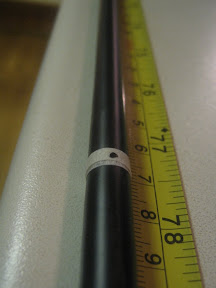
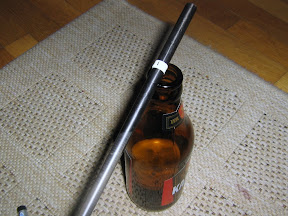
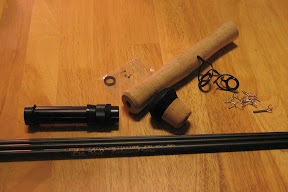
How to make a rod tube


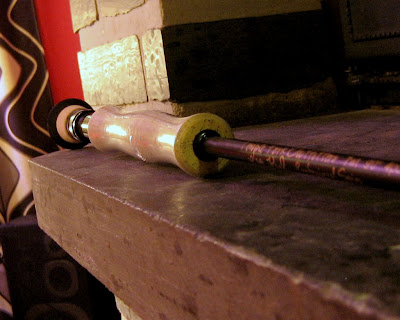
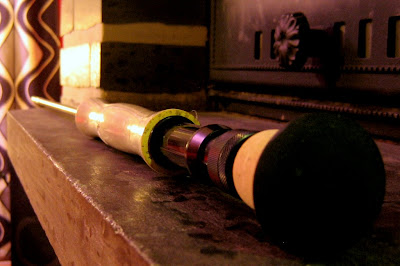
I believe you can figure it out from here.

Thursday, August 13, 2009

Great Rod Building Resource: Solway Custom Components Blog

An excellent new rod building blog Solway Custom Components. Check it out, it's well worth it. I know I will use Scott's advice on my cane project's handle and reel seat.


Scott's picture. Used with permission.

Saturday, May 23, 2009

Tuesday, April 15, 2008

Rod Building - Part 17: Inscription (hey, it's all done!)

My fly rod building project has come to its end. That's right, the rod is actually finished.

165_6542

Looks like a fly rod, doesn't it?

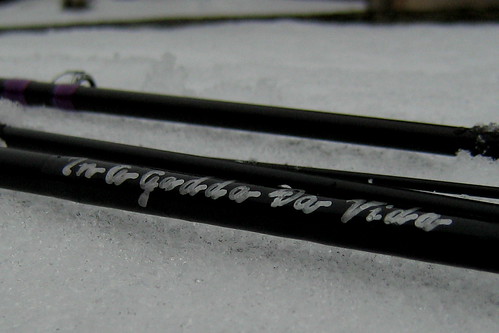
Final part of the project was not made by me, but by mrs opax, who was very kind and wrote the inscription.

164_6474

I thought a lot about the inscription. Candidates like "opax #1" were quickly abandoned. "Resembles-a-rod" would have been better, but I ended-up with "In-A-Gadda-Da-Vida".

165_6550

In-A-Gadda-Da-Vida is over seventeen minutes long song by Iron Butterfly. It was released 40 years ago. According to a legend, the title was supposed to be "In The Garden Of Eden", but someone had written "In-A-Gadda-Da-Vida," possibly while drunk or intoxicated, on a demo copy.


I have a new slogan for my blog:
If it's worth doing, it's worth overdoing.
- opax fly-fishing

Thursday, March 27, 2008

Rod Building - Part 16: "back back forth and forth"

My rod building project is going like a dance. I replaced the big ugly stripper guides with a pair of shiny, tiny chromed ones.

164_6426

Removing guides is simple. What you need is a sharp knife, steady hand, and some acetone to clean the blank.

164_6428

Does this make a better rod?

164_6441

How cares, we are after the looks here. Almost done...

Tuesday, January 01, 2008

Season Shift

P1100747

A good trout fishing season is not counted by the number nor the size of the fish. I think it is something altogether different, though the fish do play a big part. Good seasons are counted by the memories, and even then not on the quantity but on the quality of the memories. Or perhaps I am mistaken here and just trying to justify too few fishing trips with the quality over quantity crap.

Whatever the case, I had great time fishing last summer. I didn't count the numbers. Even if I had, the season 2007 was probably the best ever. I stopped keeping records a couple seasons ago. This has everything to do with the improvement. The constant drive within me is to become a better fisherman. I just don't believe in statistics; even if I could collect enough data for a reliable statistical analysis, it would just confirm something I already knew. I'm trying to get the bigger picture.

What then will the next season bring? More trout for sure, but also there are projects to finish and new ones to start.

I have the ultimate rod building project to start with a friend. The holy grail of fly rod building. We are talking about split-cane here, bamboo. It is a crazy idea of course, or, crazy enough. When the friend asked, I replied that neither of us knows how to build one, 'we need a book' I said. 'Already have one, makes good bathroom reading", he replied. I didn't bother to consider my resolution any more and simply agreed to take part in the project.

We were drunk but the agreement holds: we are dead serious when the topic involves fly fishing.

Sunday, October 07, 2007

Rod Building - Part 15.1: Who's whistling?

So far I have done all the steps required to build a fly rod. But there is a but. I have been casting with the rod and there are a few things I'm not happy with:

  • The stripping guides are making a sound like whistling with sand in your mouth.
  • Guides in the tip section are not perfectly aligned.

I think I'm going to buy some acetone and take a few steps backwards...


From Fly Rod

Tuesday, September 18, 2007

Rod Building - Part 15: The Varnish

I have used Gudebrod Rod Varnish with this rod. It is easier to use than epoxy based two part solutions, but several more coats of varnish are required.

From Fly Rod

Here is the hook keeper. It is from my first fly rod, a cheap Daiwa fiberglass rod from the 80s. The Daiwa rod is my only fiberglass rod and it is now broken. Well, at least the hook keeper is in use with my first ever custom rod. I'll try not to get all sentimental because of this.

From Fly Rod

Friday, September 14, 2007

Rod Building - Part 14: Wrapping things up

From Fly Rod


I finally had time to continue my rod building project. I had purchased single footed guides to replace the original snake guides that came with the TFO Kit. Compared to two footed guides, single footed guides are more difficult to attach to the rod blank with tape. With two footed guides you can tape one foot of the guide to the blank and wrap the thread to the other foot.

Next part: The Varnish.

Tuesday, May 08, 2007

Rod Building - Part 13: The stripping guides

From Fly Rod

After little fun with the power tools (must use them at least once a year) the stripping guides are ready to be attached to the blank.

From Fly Rod


This Temple Fork Outfitters blank was supplied with large stripping guides. They will add a bit weight to the rod but will make the shooting of fly line a bit more effective.

Note: I'm waiting for a shipment of single footed guides for this rod to arrive in any day. Should that happen, this rod might actually be finished in time for the May/June streamer fishing.

Tuesday, May 01, 2007

Rod Building - Part 12: The tip-top

If you, like me, have spent your lifetime wondering things, and if you, like me, are fascinated by fly rods, then you know that I just had to do this.

From Fly Rod

One isn't enough.

Saturday, April 28, 2007

Rod Building - Part 11: Whipping the females

From Fly Rod
If you found this page via search engines, looking some pictures of serious whipping action, you might be a little disappointed right now.

From Fly Rod
Let's face it - this is about building a fly rod. Nothing sexy and hot in high heels or lusty lingerie to be found here. There are no pictures of naked beauties getting whipped, just a fly rod.

From Fly Rod
Hey! You made it this far - Drop a comment. Thanks.

Wednesday, April 11, 2007

Rod Building - Part 10: Real Work Starts

This is the tenth phase of my rod building project, so I figured that it should be about time to actually get some work done.

I broke this down to 4+4 easy steps, so you can do it too!

1. Take one part of fly rod blank (the stiffest part – one with markings made by manufacturer), a cork grip (mine is Full Wells as this will be a 7 weight rod), a reel seat, a fighting butt (as the fish will be so big that one is required), a winding check, and some 5-minute epoxy glue.

From Fly Rod

2. Mix the glue

3. Glue the parts to the blank in five minutes

From Fly Rod

4. Admire the work

From Fly Rod

(At this point you may find out that the fighting butt and the winding check are still not attached to the blank.)

5. Take a deep breath and think about the revelation you just had:

The last seconds of five minutes are STICKY!

Playback the whole process (not initial preparations, just last five minutes) in your mind: gluing the grip was easy, you paused to take a few pictures before continuing to the reel seat and never looked the time as you really don’t have to; when working with 5 minute epoxy that is correctly mixed, you will know when the five minutes are up.

The glue at this point transforms from its liquid form to its solid form. When you not only see but also feel this process you will not only panic, you will also gain new understanding of the universe.

6. Mix another dose of epoxy glue

7. Glue the fighting butt and the winding check to your rod blank (use same rod blank part as in previous steps)

8. Admire the work

From Fly Rod

I hope that you enjoy this continuing series of bad humor and ill advises. As a final note for this phase: not a single bottle of lager was consumed during this phase, but the aroma of mixed epoxy glue was mind-blowing.

From Fly Rod

Sunday, April 01, 2007

(No) Progress Report

From Misc 2007

It's been unseasonably warm for a few weeks. I went to a river Saturday morning for a few hour casting practice only to find out that it was the coldest day of the week. Water temperature was almost +1ºC / +33ºF. Most of the time I took pictures of the details.

From Misc 2007

I have not had any progress on my rod building project, but I have ordered some single foot guides to replace the original guides. Just have to make some adjustments to the rod or I couldn't be happy with the project.

From Misc 2007

Thursday, March 01, 2007

Rod Building - Part 9: More preparations

In the previous step I located and marked the guide side of my rod blank. If this is not done properly casting will became a bit nervous. By this I mean that the rod tip will not be moving in a perfect straight line no matter what you do.

From Fly Rod

Next thing to do is to mark the guide positions on rod blank. Again we use tape and lager beer. Tape is used to mark positions and lager to avoid dehydration. In this phase you also need tape measure and some kind of chart which tells you where the guides should be placed. My chart came with the rod blank. I think that some advanced Jedi techniques also work, but I stick to manufacturer’s chart at this point.

From Fly Rod

This may be also an excellent point to check that you have enough guides. I have created following procedure to help you out here. This is something that is generally overlooked in rod building literature.

1. Take a pencil and a piece of paper
2. Count how many guide placement markings is on your rod blank
3. Write that number to the piece of paper
4. Put all guides (excluding the tiptop) you have to the table
5. Count how many guides are on your guide pile
6. Write that number to the piece of paper
7. Compare two numbers you have written down.

If you have written two same numbers down you can congratulate yourself (another lager perhaps?). You are doing great and have no worries what so ever. If not, you are in trouble! But don’t panic, I have instructions right here:

1. Count how many beers you have drank
2. Write that number to the piece of paper
3. Compare three numbers you have written down.

If the third number is close to the first two numbers, or it is even bigger than first two numbers, or you have more or less than three numbers on paper, or you don't find the paper: go to sleep and continue your rod building project later.

Tuesday, February 06, 2007

Rod Building - Part 8: Initial preparations

When you build a fly rod you just glue in a handle, a reel seat, a tiptop, and wrap the guides to the blank, right? Wrong.

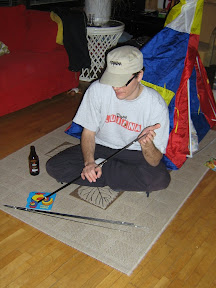
First thing to do is to figure out which side of each piece of blank you must put the guides. I don’t bother you with standard details of why or how you should do it (read it for example here if you want), instead I’ll let you in to the details that you won’t find anywhere else. It is all illustrated in picture below.

From Fly Rod by Mrs Opax.


1. It is important to sit in front of your tipi, cross-legged, and both knees touching the floor (or ground if your tipi is outside).

2. You must have a hat, but not just any hat. Mike has one that could work and it is very different looking than my hat. The important thing which to consider when it comes to the hat selection is that you should wear a hat with significance. I selected a hat which would definitely be considered as a STATEMENT if I go to the very official company Christmas party in my best suit and that prominent hat.

3. Bottle of your favorite beverage. While searching the guide side you will have a moment of doubt… well, you know what to do.

From Fly Rod

Wednesday, January 24, 2007

Rod Building - Part 7: Package opened

Yesterday my rod building project took a giant leap forward as the package arrived.

It's a Temple Fork Outfitters 9' #7 Professional Blank + Kit - From Fly Rod


I’ll consult an expert tonight and I’ll also have to think how to pimp my rod! (Does that sound weird to you as well?)

Monday, January 15, 2007

The making of a fly rod

Administrating an active fly fishing forum can be a load of work but now it has been proved that it is possible to get something in return.

Masi Hast has been administrating Finnish perhokalastajat.net site and forum for several years and finally one forum member had an idea that Masi should be rewarded somehow. He started a new thread called “A rod for Masi”.

To make a fly rod, you need time, money, and a rod maker. Many members of this forum (current member count of this forum is 3121) made a small donations. Mikko Stenberg was the one who did the work.

Here are some entries from Mikko’s Resume: FQSA Master Tyer, Two times FQSA World Champion and two time FQSA Silver Medalist, Irish Open 2006 Champion, Flymeister 2001 ”Best in Show”, Fly Fishing & Fly Tying Magazine Year 2006 Champion in Fly Tying, Second place in Fly Anglers Online competition, Two times third place in Mustad Fly Tying Competition, Two third places in Guideline Open 2005 Tying Competition, and Third place in Finnish National Fly Tying Competition 2005 (Salmon Fly series).

And naturally he can fish: Three times Champion in Finnish National Fly Fishing Team Championships.

But can Mikko build a fly rod? You can decide after viewing these images of Masi’s new Winston!


Image copyright (c) Masi Hast. Used with permission.

Image copyright (c) Masi Hast. Used with permission.

Image copyright (c) Masi Hast. Used with permission.

All images above Copyright (c) Masi Hast. Used with permission.

Tuesday, December 12, 2006

Custom fly rod

A Custom fly rod should look something like this:


Copyright (c) Antti Kymäläinen. Used with permission.

Dan Craft FT #4 9’ 4-pc by Antti Kymäläinen.

Check out his other rods as well...

Friday, December 08, 2006

Rod Building - Part 6: The Decision

I have ordered a Temple Fork Outfitters Professional Blank and Component Kit. My final choice was a 7 weight 9 foot rod, which is a compromise: I would had preferred a 10 foot blank, but the ones that I could find at this rather low price range (I don’t want to spoil anything expensive) were not reviewed anywhere.

The TFO Professional Reviews were easy to find and they were also rather positive. Other than that, it is a four piece blank which makes it rather transportable and it does have the no-fault warranty that might become useful. I also got a pretty good deal with local dealer on this one.

This rod building project of mine has two goals. First is to find out can a person who’s thumb is located in middle of the palm (it’s a Finnish expression, I don’t know is it used elsewhere) build a fly rod. The second goal is, if the first one succeeds, to have another useful fly rod.

The uses that I have thought so far are: streamer fishing for big trout, Atlantic-salmon dry fly fishing, and perhaps some still water fly fishing. I use a 9’ 5 weight rod almost all the time, but it is not at its best with big streamers.