I broke this down to 4+4 easy steps, so you can do it too!
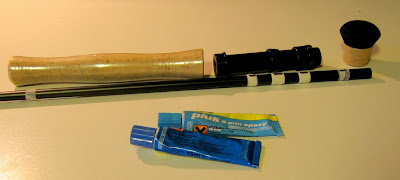
1. Take one part of fly rod blank (the stiffest part – one with markings made by manufacturer), a cork grip (mine is Full Wells as this will be a 7 weight rod), a reel seat, a fighting butt (as the fish will be so big that one is required), a winding check, and some 5-minute epoxy glue.
 |
| From Fly Rod |
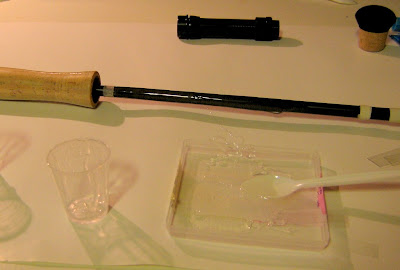
2. Mix the glue
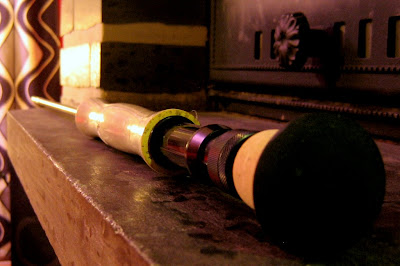
3. Glue the parts to the blank in five minutes
 |
| From Fly Rod |
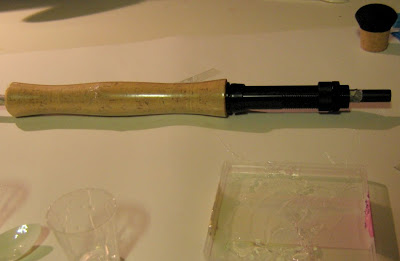
4. Admire the work
 |
| From Fly Rod |
(At this point you may find out that the fighting butt and the winding check are still not attached to the blank.)
5. Take a deep breath and think about the revelation you just had:
The last seconds of five minutes are STICKY!
Playback the whole process (not initial preparations, just last five minutes) in your mind: gluing the grip was easy, you paused to take a few pictures before continuing to the reel seat and never looked the time as you really don’t have to; when working with 5 minute epoxy that is correctly mixed, you will know when the five minutes are up.
The glue at this point transforms from its liquid form to its solid form. When you not only see but also feel this process you will not only panic, you will also gain new understanding of the universe.
6. Mix another dose of epoxy glue
7. Glue the fighting butt and the winding check to your rod blank (use same rod blank part as in previous steps)
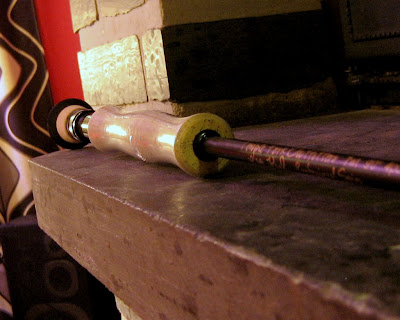
8. Admire the work
 |
| From Fly Rod |
I hope that you enjoy this continuing series of bad humor and ill advises. As a final note for this phase: not a single bottle of lager was consumed during this phase, but the aroma of mixed epoxy glue was mind-blowing.
 |
| From Fly Rod |
No comments:
Post a Comment